You are currently browsing the archives for the Free Training category.

Want More? Sign Up for our Schipul SEM Team Email Newsletter:


Archives

  • 2013
  • 2012
  • 2011
  • 2010
  • 2009
  • 2008
  • 2007

Archive for the ‘Free Training’ Category

Our very own Jennie Lane from the Schipul Search Engine Marketing team recently conducted a webinar on how to optimize your Tendenci site for SEO.  One of the great things about our Tendenci software is that SEO is baked into the code.

That is Tendenci allows you to easily edit SEO tags like Meta, Alt tags, and Title tags directly from the interface (no coding required).

If you have a Tendenci site and would like know how to easily optimize your site for search engines be sure to review her slide presentation.

Learn more about the SEO features of Tendenci including:

  1. The automatic SEO features of Tendenci, and how you can best take advantage of them
  2. What custom SEO features are available in Tendenci
  3. Tips for optimizing content like pages, articles, photos, news releases, etc.


Guest Blogger:  Laura Rodnitzky is the Director of Production for PPC Associates, a search engine marketing agency with offices in San Mateo and Chicago.

AdWords Editor is a go-to tool for anyone managing large accounts or campaigns in Google AdWords. But even if you’re only dealing with small campaigns, it’s worth checking out this free tool from Google. AdWords Editor allows you to make bulk changes to individual or multiple campaigns – changes that cannot be made easily through the AdWords UI. As an added bonus, all of this is done offline so you can easily revert errors or unwanted changes before posting anything live. In this post, I’ll outline some of my favorite AdWords Editor tools.

1.       Advanced Bid Changes

Let’s say you’re nearing the month’s end and you find yourself with some budget to spare. Among other things, you may decide to increase bids across the board or across top-performing campaigns, ad groups, keywords, or placements. In the AdWords UI, you have the option of copying a particular bid from one keyword (for example) to several others on the page. In the screenshot below, the up/down arrows next to the $0.25 max CPC indicate I’m copying that bid to the other selected keywords.

Google Adwords Editor - Advanced Bid Changes

So that’s useful if I want the same value for each keyword. But what if I have different bids for different keywords, and I want to increase all of them by 25%? That’s where the Advanced Bid Changes option in AdWords Editor comes in handy. To find it, go to the tab where you need to make bid changes (Keywords, Placements, Audiences, or Ad Groups). Select the data you need to adjust, and then click on the link below to “Advanced bid changes”.

Google Adwords Editor - Advanced Bid Changes Setting

The pop-up box gives you the option to increase or decrease bids by a certain percentage amount or dollar amount. You also have the option of setting minimum or maximum caps on bids. And as always, since you’re working in AdWords Editor, you can easily revert or modify any bid changes that seem out of whack prior to posting the changes live to your account.

2.       Copying Campaign Settings

At PPC Associates, we are constantly reviewing performance across different geos and different times (day of week, hour of day) for our accounts to look for additional optimization opportunities. Unfortunately, we can only apply hour of day bid adjustments or custom geos in the UI at this time, but we can use AdWords Editor to easily copy these specialized targeting settings to multiple campaigns.

Here’s how to do it: In the Campaigns tab, select the campaign that already has the targeting settings you need (this assumes you have already clicked on “Get recent changes” in AdWords Editor to download the settings you created in the UI). Right click on the campaign and select “Copy campaign shell.”  Alternatively, you can go to “Edit” à “Copy campaign shell.” This automatically copies the following settings: Devices, Ad schedule, Language targeting, and Location Targeting. Now you can go to any other campaign in that account in AdWords Editor, and simply click on “Paste” next to any of those four settings to copy over the targeting.

Copy Campaign Shell in Adwords Editor

I should note that you can copy campaign settings fairly easily in the AdWords UI, as shown in the screenshot below. However, I still prefer working in AdWords Editor whenever possible, since it reduces the potential for errors.

Copy PPC campaign setting in Adwords UI

3.       Custom View (Advanced search)

Finally, the Custom View option (also called Advanced search). This powerful tool lets you apply multiple filters based on campaign or ad group name, words contained in ad text or URLs, performance statistics, status, and more. We use this tool often to QA our work prior to posting, especially when making complex changes in bulk. To find the tool, either click on “Advanced search” in the top right of any tab, or use the “View” drop-down menu to find “Create or set custom view…”

Custom View in Adwords Editor

Once you’re in the custom view, add as many filters as needed. For example, if I’ve recently appended destination URLs with a new tracking parameter (CUSTOMCMPGN) and want to easily identify any URLs missing the parameter, I change the settings to “Destination URL” “doesn’t contain” “CUSTOMCMPN.” But maybe that new parameter is only used for ad groups containing the word “free.” I can add a second filter for “Ad group name” “doesn’t contain” “free.” And if I’m only concerned with active ad groups? In the “Status” section, I check the box next to “Enabled” and nothing else. The results will be ads from active ad groups, not containing the word “free” in the name, and missing the new parameter.

Advanced Search in Adwords Editor

Fluency with AdWords Editor does more than let you work on your accounts offline; it’ll save you tons of time with its advanced tools – and it’ll save you the time and headaches of troubleshooting errors pushed live directly from the AdWords UI. It’s arguably one of the most indispensable tool of all SEMs, from beginners to 10-year vets.

HOWTO: Submit Your Website to DMOZ

posted by Jennie Lane
Thursday, September 15, 2011

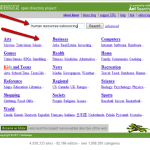
Why You Should Submit Your Site to DMOZ

DMOZ is the largest open directory and many search engines like Google rely on it for additional information about a website. The main reasons to submit your site to DMOZ is to gain an authority backlink and consequently improve your search ranking.  It is free to submit your site to DMOZ but it can be a difficult process.  This blog post should help

How To: Submit Your Site to DMOZ

The first thing you should do when visiting dmoz.org is to run a search for the URL you plan to submit. This will ensure that you aren’t submitting a duplicate listing.

Assuming your search brought you no results, you are ready to choose a category. When you visit dmoz.org you will be brought to a page like the one below and faced with several category options. To save yourself some time you could do a search for your main keyword. In my example, the main keyword phrase is “human resources outsourcing.”

DMOZ Categories

After searching for your keyword phrase you will be brought to a page with other web site listings that are hopefully in a category that also suits your website. Now click the category. For example, “Business: Human Resources: Outsourcing.”

DMOZ Category Search

Once you are inside the category, click “suggest URL” in the top right navigation.

DMOZ URL Suggestion

On the “suggest URL” page you will have to input your web site URL and a title for the site. Below the “Site URL” box you can see that DMOZ has provided many rules that you should follow if you ever plan on getting into their directory. There are also rules for your site title such as not using all caps and always using the official name of the web site.

DMOZ Submission

Once that is complete you can move on to the description. Keep your description at less than 30 words and avoid using all caps, promotional lingo (best, cheapest etc.), repeating the title and always check your spelling and grammar.

DMOZ Submission Description

Enter your email address and the text from the captcha and press submit.  You will then be brought to a screen that lets you know your DMOZ submission was received.

DMOZ is run by volunteer editors, which explains why the wait for a URL submission can take weeks, months and even years. The important thing you can do at this point is to submit it and forget it. Do not submit your URL every few weeks. That will not speed up the process and could result in your web site being permanently banned from the directory.

Last month, our rock star Search Engine Marketing Manager, Caitlin Kaluza, gave a webinar on Intermediate Google Analytics. In case you missed it, we are recapping all the great information in today’s blog post. As an added SEM brain candy bonus, we’ve got all the slides from the webinar below.

Key takeaways from the Intermediates Google Analytics webinar:

  • Email notifications are available for any website you are tracking.
  • Goal setting is highly recommended.
  • Learn about funnel and funnel reporting.
  • Learn how to set advanced filters to your Analytics reports.
  • Of all the reports Google Analytics offers you, which metrics should you be caring the most about? Visits, visitors, traffic sources, and conversions.

If you need a quick recap of Google Analytics basics, take a look at this Intro to Google Analytics presentation.

We’ve got a number of fantastic upcoming training webinars that we hope you’ll check out.

Here’s a few of the Schipul webinar events coming up in August:

Be sure to click the link and register for any or all of these great webinars for free!

Don’t forget to check out the rest of the Schipul events on our calendar and remember SchipulCon 2011, our exciting web marketing conference, is taking place October 6-7 in Houston, TX. Register today!